![]() Important
Important
![]()
Take note that the Date dimension type is an advanced type of Dimension,
which will ALWAYS be created via the Multidimensional Approach.
To create a Date Dimension:
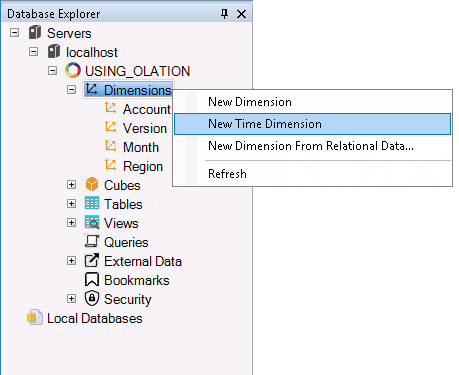
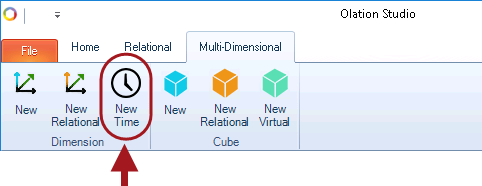
1. In the Database Explorer, expand the appropriate database, right-click on Dimensions, and select the New Time Dimension option.
Alternatively, go to the Multidimensional Tab of the OLATION ribbon and click on the New Time or New Time Dimension command icon.
2. In the Create New Dimension dialog box that appears, specify the <dimension name>, e.g., Date.
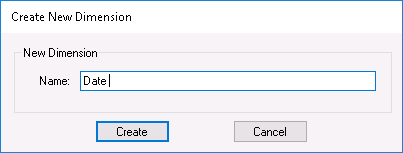
3. Click Create.
This opens the Dimension Editing Window on the right. This window displays information about the Date dimension as well as other settings that can be configured for this Dimension type.
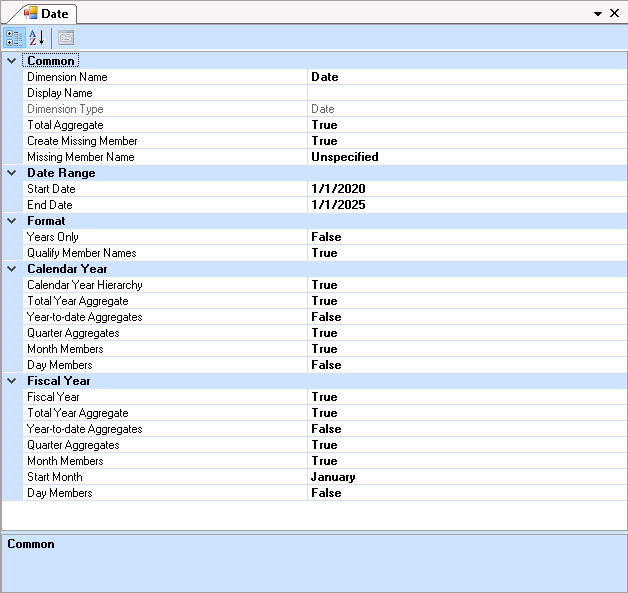
4. In the Date Range section,
specify the Start Date.
To do this:
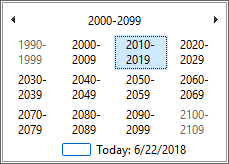
Go to the Start Date setting and click the drop-down button to choose your desired start date, for example, January 1, 2020.
A calendar-style view of the current month will appear.
If you click on the calendar’s header, the view will change, making it easier to navigate and select a different date.
You can also use the left arrow buttons on the calendar to scroll through earlier months or years to find the date you want.
Figure 1: Upon clicking dropdown button |
Figure 2: 1st click on Header |
Figure 3: 2nd click on Header |
Figure 4: 3rd click on Header |
5. Still in the Date Range section, you will now set the End Date.
To do this, go to the End Date setting and click the drop-down button to choose your desired end date, for example, December 31, 2021. The process is the same as when setting the start date — a calendar will appear, and you can use its header or arrow buttons to navigate and select the correct date.
6. Define any additional elements you want for the Date dimension.
If you need more information about the different attributes you can set for the Date dimension, click the provided link for details.
In this example, we will create a Calendar Year Hierarchy for the Date dimension. This hierarchy will cover the period from January 1, 2020, to December 31, 2021. It will have the Total Year Aggregate feature enabled and will display only the Quarter Months and individual Months within each year.
7. Go to the Format section and set the Years Only option to FALSE.
If this is set to TRUE, the Calendar Year and Fiscal Year sections will be hidden/unavailable. Setting this to FALSE will display those two sections in the Date Dimension Window.
8. Go to the Calendar Year
section. In this example, we are using a Calendar Year
setting to build the Date dimension. Therefore, we need to enable
the Calendar Year Hierarchy option. Once this option
is turned on, all the related configuration and setting options for the
Calendar Year will appear, allowing you to adjust them as needed.
Define the following in the CALENDAR YEAR section:
Set the Calendar Year Hierarchy option
to TRUE.
Note: Doing so will display all other Calendar Year settings.
Set the Total Year Aggregate option to TRUE.
Set the Year-to-date Aggregate option to FALSE.
Set the Quarter Aggregates option to TRUE.
Set the Month Members option to TRUE.
Set the Day Members option to FALSE.
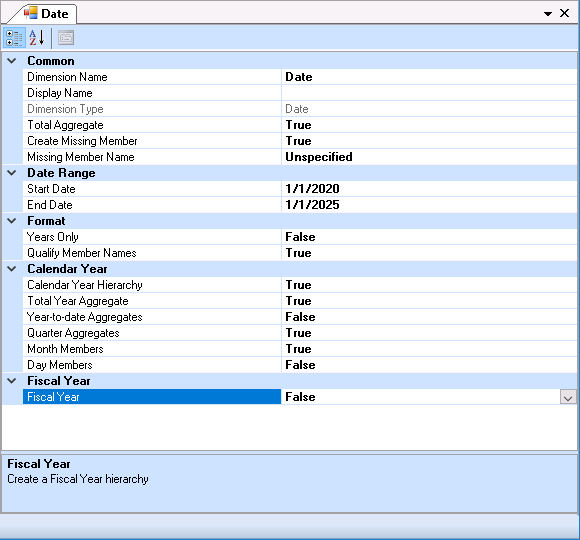
9. Go to the Fiscal Year section
and set the Fiscal Year option to FALSE.
This will hide all related Fiscal Year settings from the Date Dimension
Window.
The Date Dimension Window will look as follows:
10. Once you have completely defined the attributes for
the Dimension, click the Save Dimension icon ![]() .
.
The Date dimension will now be listed under Dimensions
in the Database Explorer.
Additionally, take
note of the small icon that appears before the Date dimension name. This icon
is specific to dimensions of the Date type. Any dimension
you create or define as a Date dimension will display this same icon,
making it easy to identify Date dimensions at a glance in the Database
Explorer.
that appears before the Date dimension name. This icon
is specific to dimensions of the Date type. Any dimension
you create or define as a Date dimension will display this same icon,
making it easy to identify Date dimensions at a glance in the Database
Explorer.

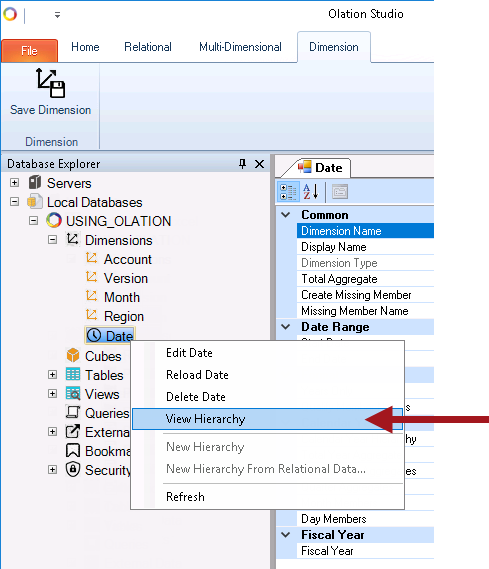
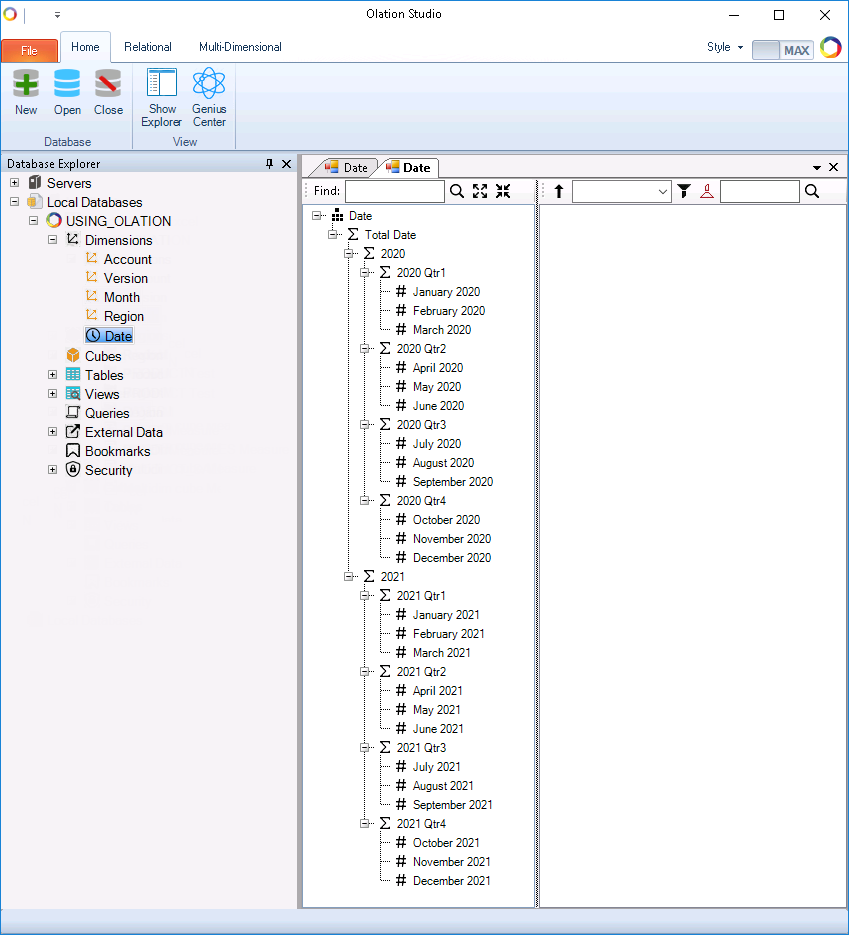
11. To view the Date dimension Members and hierarchy structure created: go to the Database Explorer section of the OLATION window, right-click on the Date dimension and select the View Hierarchy option. The Dimension window will be displayed as follows: