OLATION® cubes can be accessed and viewed in PowerOLAP® through the OLATION® Linked Cube feature embedded in the PowerOLAP® application. A bit similar to the PowerOLAP® Services feature, users can create New OLATION® Linked Cube as well as update an OLATION® Linked Cube. However, in the OLATION® Linked Cube process, you are no longer required to specify a provider. Instead, you are required to specify the relational source, and the engine searches all the OLATION databases (or databases converted to OLATION®) as well as all their corresponding cubes.
To create an OLATION® Linked Cube:
1. Launch PowerOLAP® and create a new database.
In this example, name it "From Olation to Olation Linked Cube".

2. From the PowerOLAP ribbon, go to the Tools tab.
3. In the OLATION Cube control group, select New Linked Cube.
This opens the OLATION Source Type dialog box.
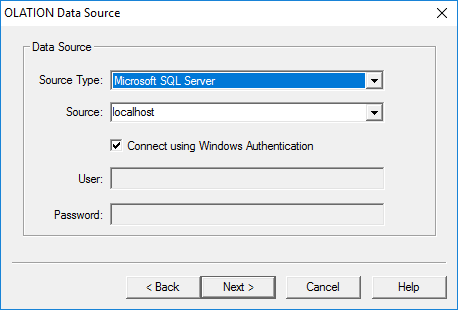
This dialog asks the user to:
Specify the appropriate Database Source Type from the drop-down. In this case, select Microsoft SQL Server.
Specify and the Data Source name. You can either select it from the drop-down list or enter the source name. In this example, enter localhost since the OLATION cube is in the local Microsoft SQL Server.
Connect to the relational source by either using Windows Authentication or through a valid username and password log-in. Enabling the Connect using Windows Authentication option disables the User and Password fields. Enter a valid username and password in the fields if you chose to connect to SQL.
4. Click Next.
This opens the Database Name dialog box.
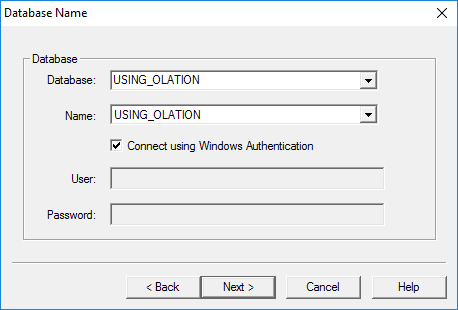
This dialog asks the user to:
Specify the appropriate Database from the drop-down list of OLATION databases in the specified relational source. In this case, select USING_OLATION.
Specify an existing Database name from the drop-down list. In this case, select USING_OLATION.
Connect to a SECURED OLATION database (as opposed to before where you provide authentication to connect to a relational source) by either using Windows Authentication or through a valid username and password log-in. If you are trying to connect to an unsecured OLATION database, you can skip this authentication setting and go to the succeeding screen.
5. Click Next.
This opens the OLATION Cube dialog box.
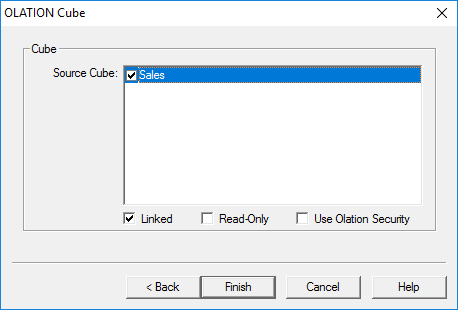
This dialog asks the user to select a source cube from the list box. In this example, select Sales.
Also, this dialog asks the user to determine how data is retrieved from the OLATION cubes. Setting options that can be selected are Linked, Read-Only and Use Olation Security.
The Linked option, enabled by default, links the OLATION database to PowerOLAP. The option, when disabled, still links both application until the database is disconnected in OLATION or OLATION services is stopped. The OLATION database then loses the connection with PowerOLAP. PowerOLAP can still work on the last captured data from the OLATION database.
The Read-Only option simply retrieves data from the OLATION cubes. Any changes made in a PowerOLAP slice is retained in the slice and is updated back to the OLATION cubes.
The Use Olation Security option is used to secure a database based on end-users' privileges to specified areas of a shared OLATION database.
6. Click Finish.
If PowerOLAP® was able to successfully create the cube, a prompt such as below appears.
7. Click OK.
To view the data from the OLATION Cube, create a slice in PowerOLAP®.
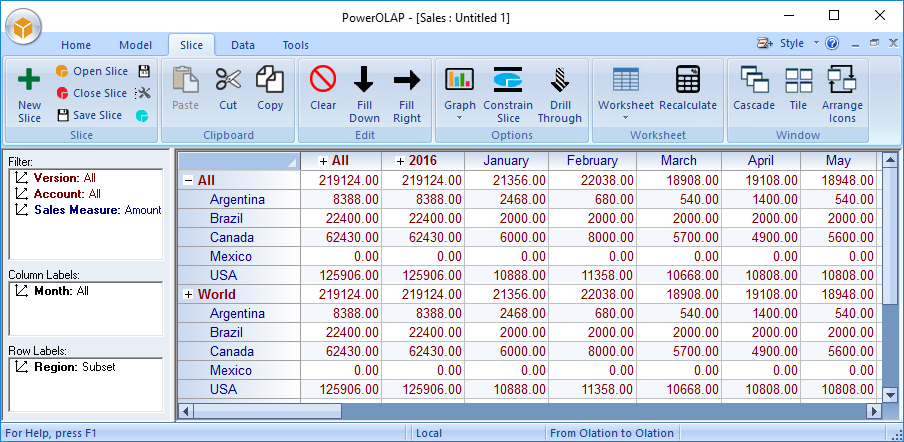
By recalculating the slice, you are able to view the Fact Data contained in the OLATION® cube that you have just pulled into PowerOLAP®.
As previously mentioned, if you have configured the Read-Only setting, all the modifications that are made into the fact data or metadata in PowerOLAP® are retained in PowerOLAP®.