Until now, we have worked with only one Slice in a worksheet; now, we will add a second.
First, arrange an example Slice using the Perspective Slice Type. The one on the image below shows Filters for Amount, Actual, Entity A, Sales, 2022 with the Q1, Q2, Q3, Q4 for Month in Columns, and selected Members from the Account dimension. (These Members comprise a Subset that was demonstrated earlier, i.e., DESCENDENTS;EBIT). The image shows the selected Members in yellow highlight.
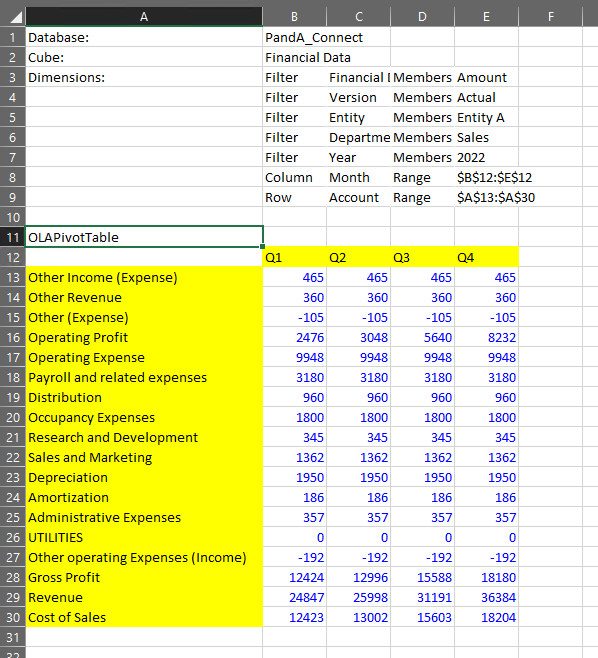
The operative functions/Cells, their respective Cells, and their use are as follows:
OLAConnection |
B1 |
Establishes connection to Olation analytical database. |
OLACube |
B2 |
Allows selection of Cube in the database. |
OLATableMember |
B3 - B6 |
Allows selection (Filter) of Member in a Dimension. |
OLATableRange |
B7, B8 |
Allows a range of Members in a Dimension to be shown. |
OLAPivotTable |
A10 |
The function used to create the Slice (This is the operative function for the Perspective Slice Type.). |
Returning the task of creating a second PowerExcel Slice (or “Slice area”) in the same worksheet: you can simply do the following:
1. Click on the PowerExcel tab—or, if the PowerExcel sidebar is open, then.
2. Click New on the PowerExcel ribbon (if the PowerExcel sidebar was open, note that the button at bottom right says Insert).
3. Indicate in the Location (Step 1) text box the Cell where you want to position the insert of the Slice (e.g., Cell $J$1, as in the following image).
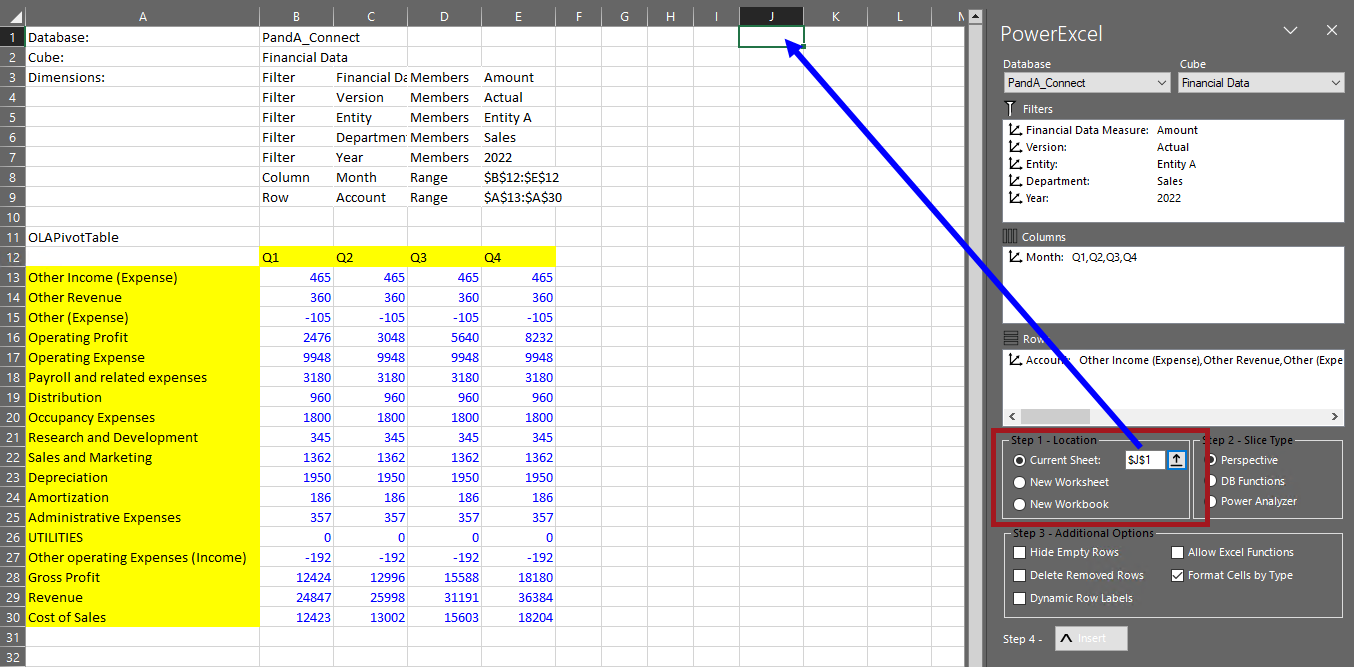
4. For present purposes, keep all other defaults—i.e., if recreating the Slice shown previously, maintain the same Filters, Column and Row Members, and use the Perspective Slice Type to create the Slice.
5. Click Insert. The second Slice in the worksheet, essentially a replication of the first, will appear as follows:

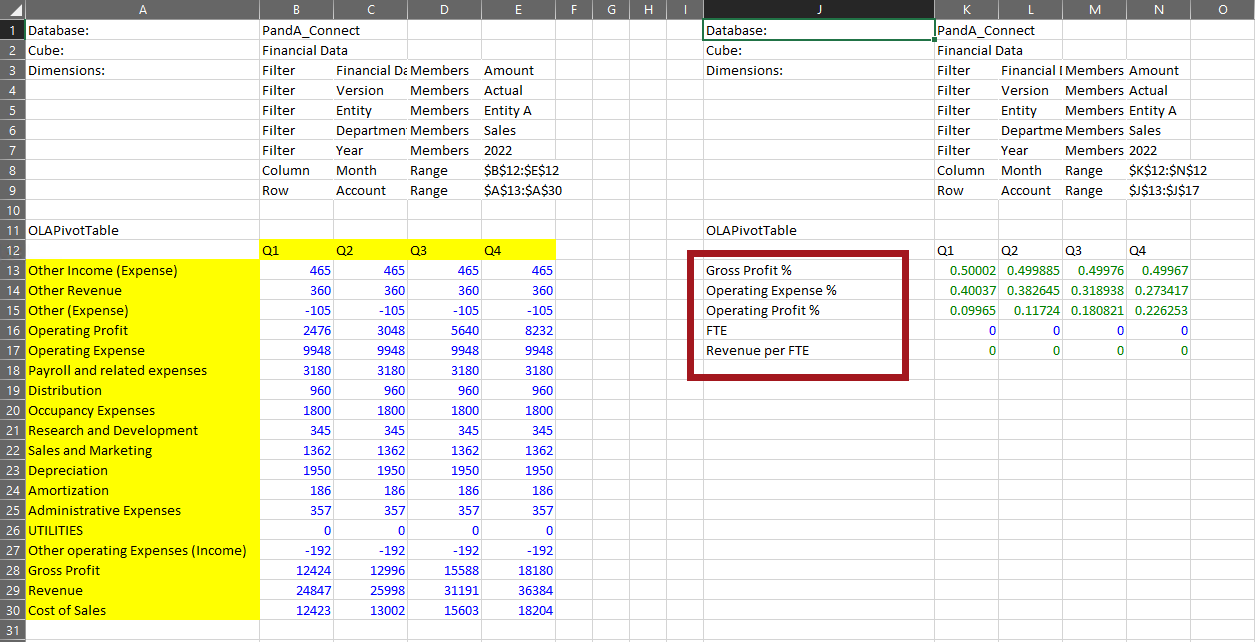
Now, in order to change the Filters on either of those two PowerExcel Slices, one could simply click on the OLAPivotTable cell (A11 for the first Slice, J11 for the second—both boxed in the preceding image. The PowerExcel sidebar will appear, and it would simply be a matter of changing selections in either Columns or Rows. The next image shows that very thing: with selected Metrics Account members (boxed in red below) showing in the Rows of the second Slice.