Another advanced Nexus capability concerns Security—what you can do to create Users and Groups and to define security parameters (via “data rules”); Security determines what users can see or do within a Nexus model.
Creating a security schema involves several steps—the following is a simple example, which is intended to limit a User (e.g., Jack Villeneuve) to being able to “Write and Read” in the Region (Dimension) of Canada (a Member of that Dimension) only .
![]() Notes
Notes
![]()
A full explication of Nexus Security capabilities is obtainable in the
Olation Manual and Help file.
As shown there, there are virtually limitless security rules that can
be put in place to satisfy the most stringent customer security requirements.
1. The first step in using Security is to make the Nexus database a Secure Database.
a. In the Database Explorer, right-click on the appropriate database, which, in this example, is the PowerExcel Planning Model.
b. Select Properties from the options.
c. In the Database Properties dialog (where you can specify such options as Integrated Windows Authentication, Daily Save Time, Periodic Save, etc.), click to select Secure Database.
d. From the drop-down arrow, select True. Alternatively, you can double-click on False to toggle to True and vice versa.

e. Click OK.
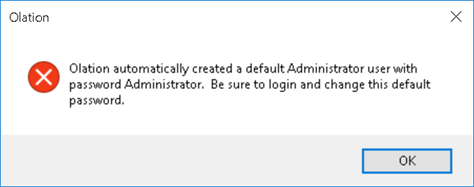
A message will appear indicating that the database is secure, and the default Username and Password: Administrator and Administrator.
2. After configuring the Secure Database setting, the next time you open the database or try to create a Slice, you will be prompted for the Login Credentials. Enter the Username and Password and click Login.

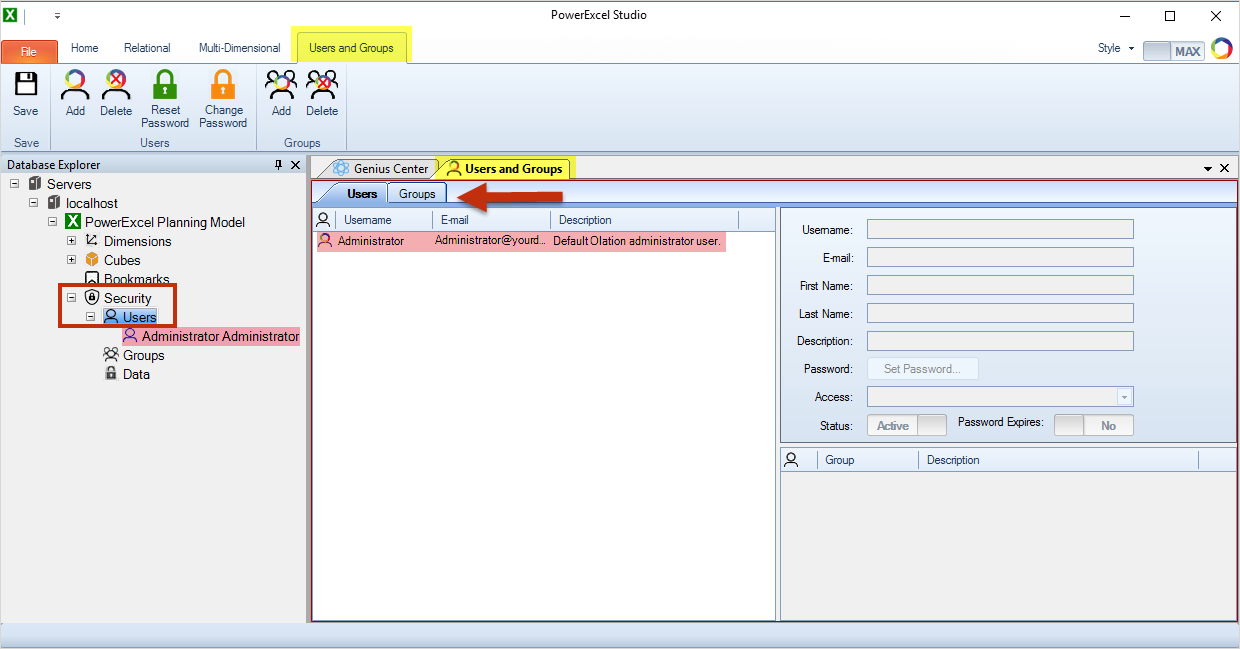
3. To begin indicating Users and setting up Data Rules, expand Security (framed in red in the image below together with Users) in the Database Explorer.
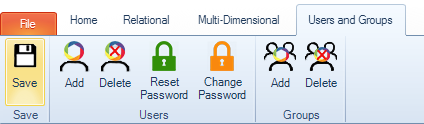
4. Right-click on Users (framed in red in the image below) and click Edit Users….
Users
and Groups tabs appear on the ribbon and on the right pane (Both
are highlighted in yellow in the image below.). The Users
and Groups tab on the ribbon has its own set of icons. The Users and Groups tab on the
right pane has two tabs under it called Users
and Groups (red arrow pointing
to the tabs in the image below). Note that a default Administrator
user is displayed under Users
on the Database Explorer and is listed under the Users
tab (Both are highlighted in pink in the image below.).
5. Under the Users tab, right-click within the area and select Add from the options.
A New User is added under the same tab and the fields on the right become active.
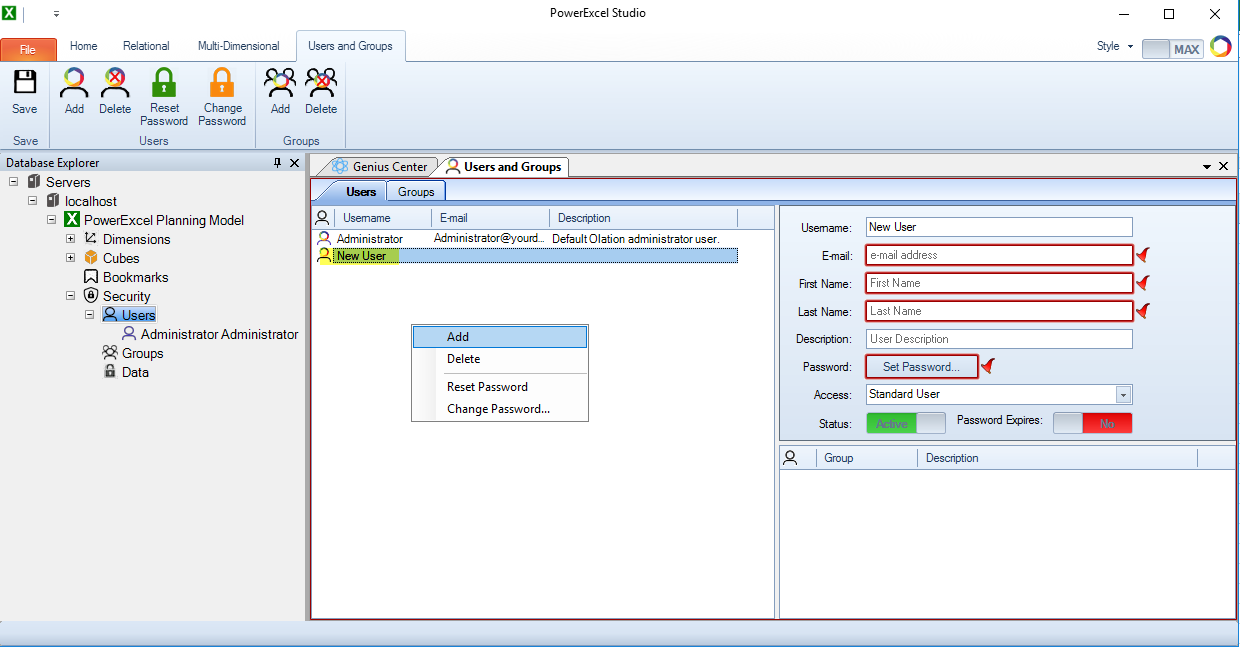
6. Populate the fields with information about the user, which, in this example, are details for “Jack Villeneuve.”
7. Click on the Set Password button to display the Change Password prompt where you enter and verify the password for the newly added user.
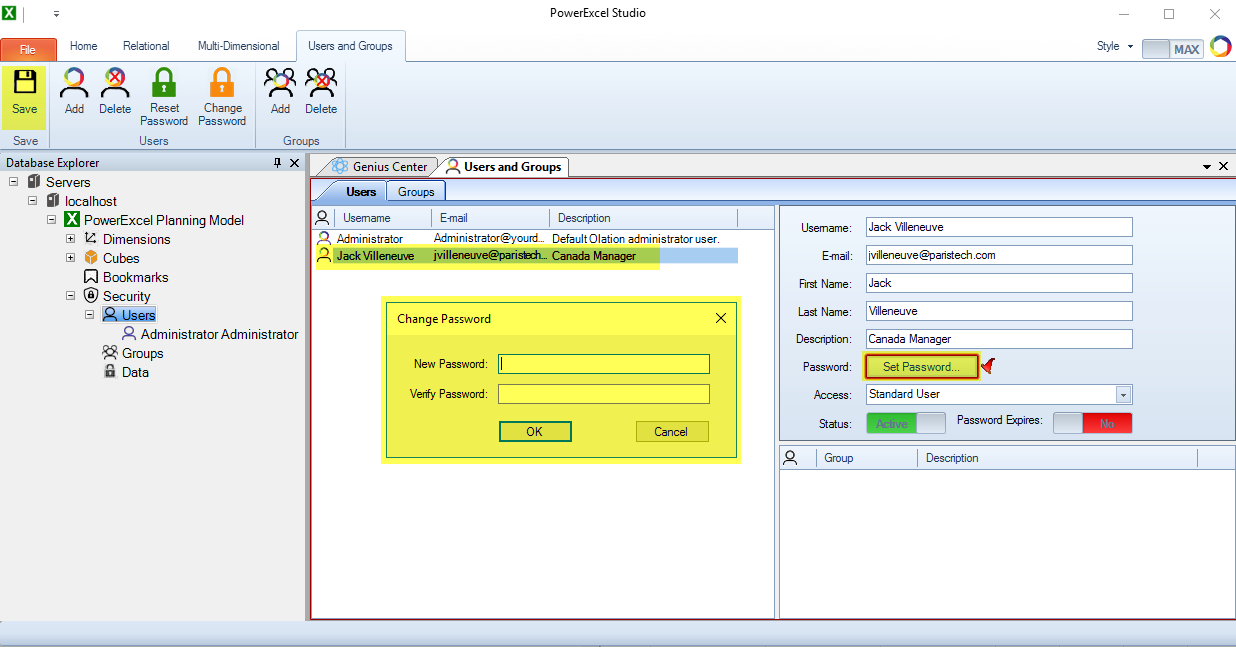
8. Click OK in the prompt and click Save on the ribbon.
9. To create a Data Rule for the newly added user, which, in this case, is Jack Villeneuve, right-click on Data under Security in the Database Explorer and select Edit Security.
Data Security tabs appear on the ribbon (with its own set of icons) and on the right pane.

10. The Data Security tab on the right is composed of four panes. Go to pane where Rule Name is found, right-click within the area, and select New.
11. Give the Rule a name, which, in this example, is Canada Read_Write.
In this example, the intention is to limit the new user to being able to “Write” (which includes “Read” privileges) to only the Canada Region.
12. Make sure you click to select the Rule Name to activate the Cubes pane.
13. Select a Cube and, following that, Dimensions and Members that will comprise parts of the definition for the Rule you have in mind.
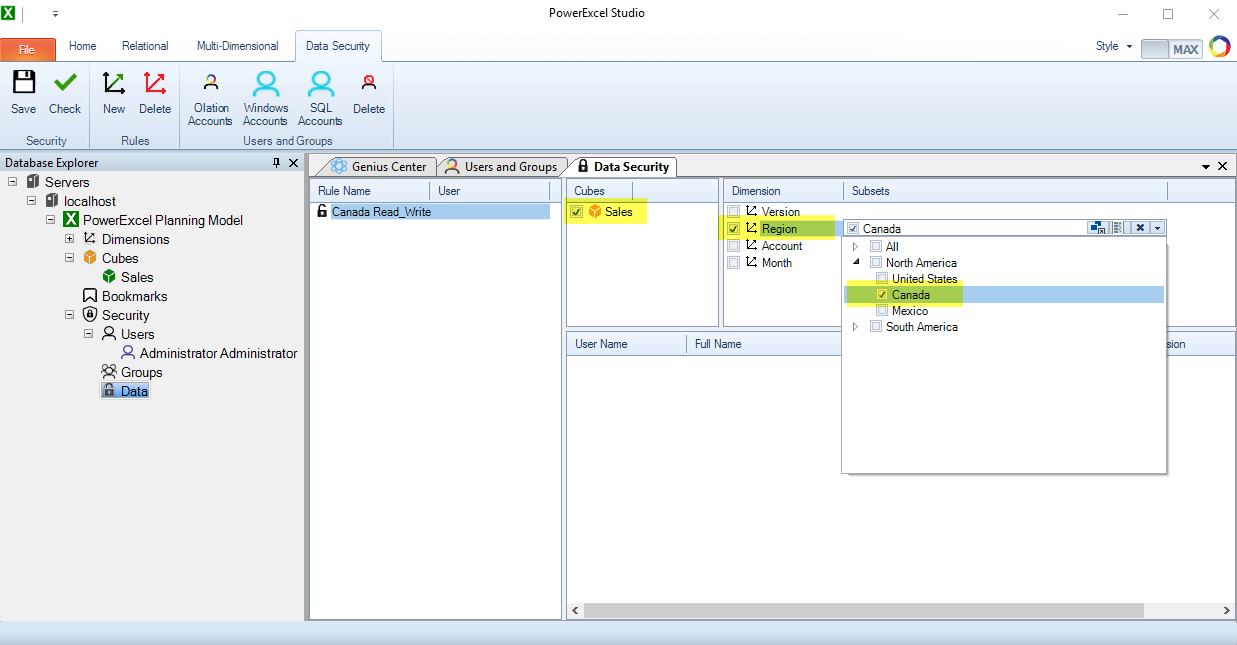
14. In this example, tick on the Sales checkbox found on the Cubes pane.
15. The Dimensions pane becomes active so you can select which Dimensions and Members will be under the Rule. In this example, tick on Region and then Canada.
16. Specify the User by right-clicking anywhere on the bottom pane and selecting Add Olation Account (other options are available to specify other user login accounts).
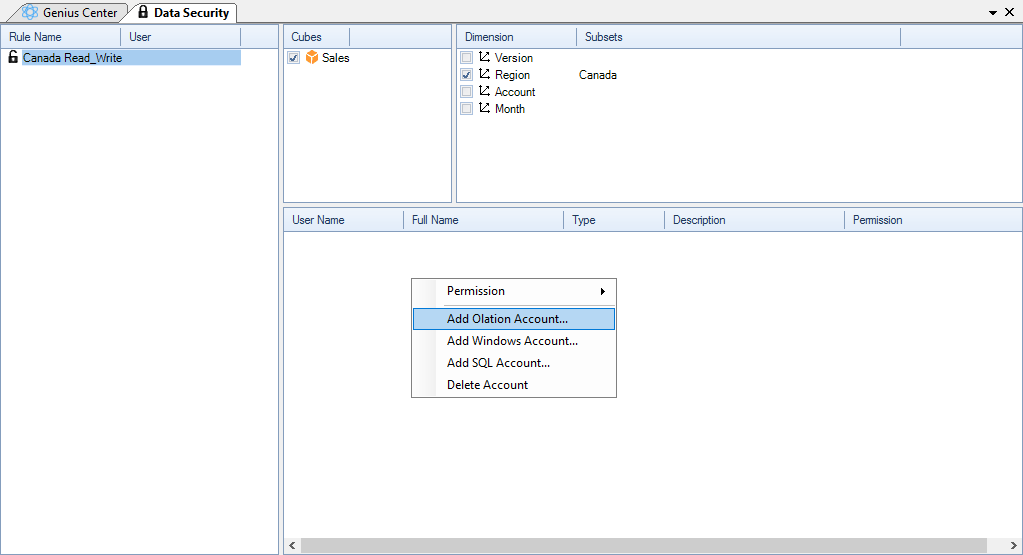
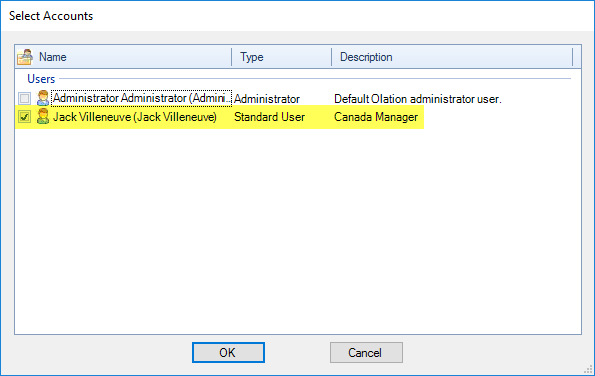
The Select Accounts window appears with named users.
17. Select the User, which, in this example, is Jack Villeneuve and click OK.
18. The User will be listed in the bottom pane. Right-click on the User and select the Data Rule level of privilege by clicking Permission and selecting Write from the options.
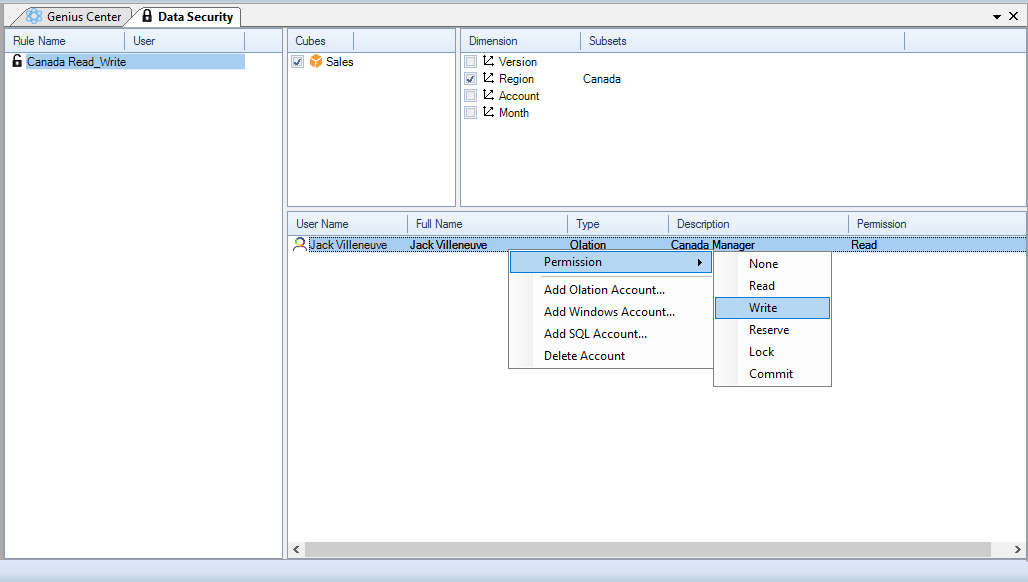
19. The User and his or her privilege will be shown:

20. Click Save on the ribbon.
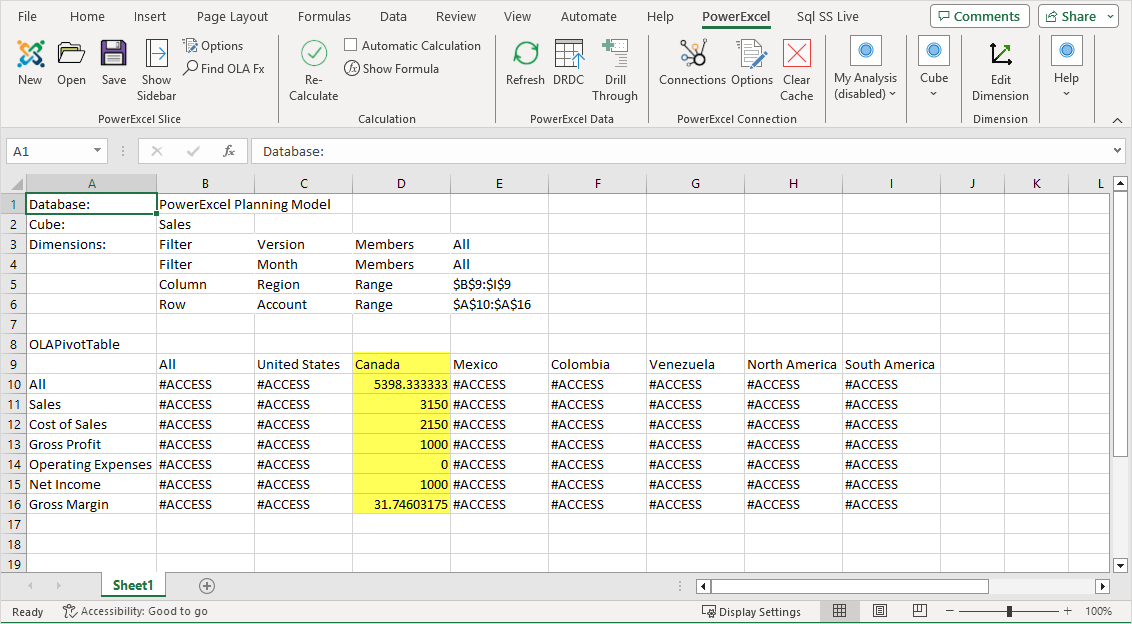
21. With the User created and the Data Rule saved for that User, the next time he or she opens a view (e.g., via a PowerExcel Slice, as shown in the next image), only Canada data will be visible (highlighted in the image). In this example, the user, Jack Villeneuve, would also be able to “write” values in Detail intersection cells, assuming that were part of the application (e.g., a budget or forecast planning exercise). Note that all other cells show #ACCESS (as shown in the following image).