Google VIP sheets – Quick Steps to Create a Slice
The following quick steps follow an exercise with a sample Web Server (VIP.PARISTECH.com) and database (Panda V21.6 Basic), to familiarize you with the capabilities of Google VIP sheets. You can reach PARIS Technologies at info@paristech.com or +1 215 340 2890 to discuss creating a model to use with Google VIP sheets with your own business data set
1. In Google Chrome, login using valid g-mail credentials and click on Google apps,
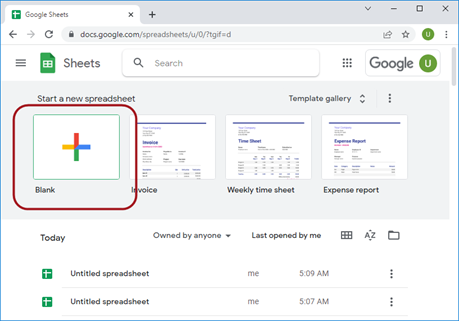
then click on Sheets:
2. Click the Blank spreadsheet to open a new spreadsheet:
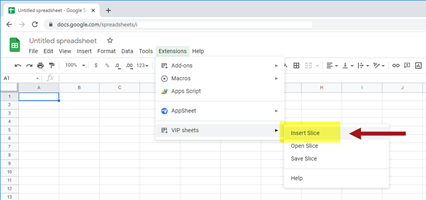
3. In the Blank spreadsheet, go to the menu bar. Click Extensions and select VIP sheets then Insert Slice
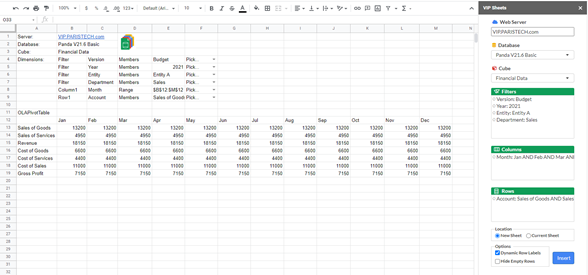
4. The VIP Sheets pane will appear on the right-hand side of the screen. Enter necessary information and make selections to configure the Slice:
You can click Insert now, or make the selections (double-clicking on Dimensions and using the Select a Member dialog) like those shown below, in which case the Slice will appear as follows:
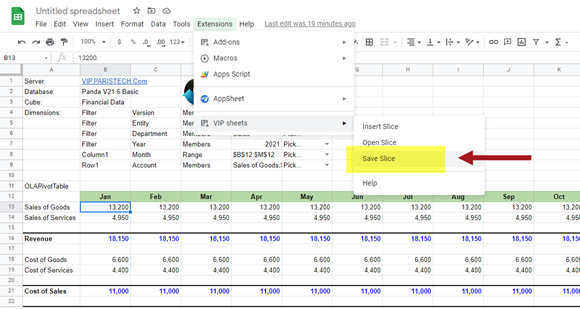
4. Apply Google sheets formatting as desired
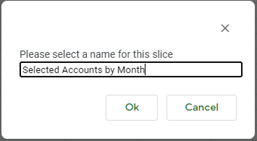
5. Save the Slice with the name you choose so that other users with security privileges can reach the same data immediately upon opening it.
Other users can proceed to Slice the data according to their own interest and requirements, including “writing back” to a budget plan (for example) application. All users are connected via Google VIP sheets to the same business model for planning, analytics, and reporting.


